
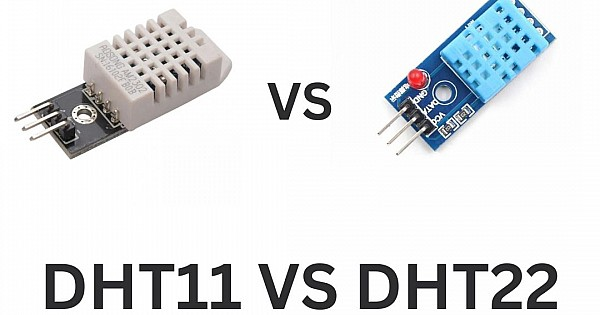
If you’re just starting with electronics projects and want to measure temperature and humidity, you’ve probably come across the DHT11 and DHT22 sensors. These are two of the most popular sensors in the maker community, and for good reason – they’re affordable, easy to use, and perfect for beginners. But which one should you choose? Let’s break it down in simple terms.
What Are These Sensors?
Both the DHT11 and DHT22 are digital sensors that can measure two things:
- Temperature (how hot or cold it is)
- Humidity (how much moisture is in the air)
Think of them as tiny weather stations that you can connect to your Arduino, Raspberry Pi, or other microcontroller projects. The best part? They come pre-calibrated from the factory, so they’re ready to use right out of the box!
How Do They Work?
Inside each sensor, there are two main components working together:
For Humidity Detection:
- A special material (like a polymer) sits between two metal plates
- When there’s more moisture in the air, this material absorbs water and changes its electrical properties
- The sensor measures this change to determine humidity levels
For Temperature Detection:
- A component called an NTC thermistor changes its electrical resistance as temperature changes
- When it gets warmer, the resistance decreases; when it gets cooler, the resistance increases
- The sensor measures this resistance change to calculate temperature
DHT11: The Budget-Friendly Option
Specifications:
- Temperature Range: 0°C to 50°C (32°F to 122°F)
- Temperature Accuracy: ±2°C (±3.6°F)
- Humidity Range: 20% to 80%
- Humidity Accuracy: ±5%
- Reading Speed: 1 reading per second
- Price: Usually $2-5
Best For:
- Indoor projects like home weather stations
- Learning and educational purposes
- Projects where high precision isn’t critical
- Budget-conscious makers
Pros:
- Very affordable
- Smaller size
- Faster readings (1 per second)
- Perfect for beginners
- Low power consumption
Cons:
- Limited temperature range
- Lower accuracy
- Can’t measure very high or low humidity levels
DHT22: The Performance Upgrade
Specifications:
- Temperature Range: -40°C to 125°C (-40°F to 257°F)
- Temperature Accuracy: ±0.5°C (±0.9°F)
- Humidity Range: 0% to 100%
- Humidity Accuracy: ±2-5%
- Reading Speed: 1 reading every 2 seconds
- Price: Usually $5-10
Best For:
- Outdoor weather monitoring
- Professional or commercial applications
- Projects requiring high accuracy
- Extreme environment monitoring
Pros:
- Much wider temperature range
- Better accuracy for both temperature and humidity
- Can measure full humidity range (0-100%)
- More reliable for long-term projects
Cons:
- More expensive
- Slightly larger
- Slower readings (every 2 seconds)
Side-by-Side Comparison
| Feature | DHT11 | DHT22 |
|---|---|---|
| Price | Lower ($2-5) | Higher ($5-10) |
| Temperature Range | 0°C to 50°C | -40°C to 125°C |
| Temperature Accuracy | ±2°C | ±0.5°C |
| Humidity Range | 20% to 80% | 0% to 100% |
| Humidity Accuracy | ±5% | ±2-5% |
| Reading Speed | 1 per second | 1 per 2 seconds |
| Size | Smaller | Slightly larger |
| Best Use | Indoor, learning | Outdoor, precision |
Connecting and Using These Sensors
The great news is that both sensors are incredibly easy to connect:
What You Need:
- Your sensor (DHT11 or DHT22)
- A microcontroller (like Arduino)
- A pull-up resistor (usually 4.7kΩ or 10kΩ)
- Some jumper wires
Basic Connections:
- VCC/Power: Connect to 3.3V or 5V on your microcontroller
- GND/Ground: Connect to ground
- Data: Connect to any digital pin on your microcontroller
- Pull-up resistor: Connect between the data pin and power
Both sensors use the same wiring setup and are completely interchangeable – if you build a project with a DHT11, you can swap in a DHT22 later without changing any wires!
Which One Should You Choose?
Choose the DHT11 if:
- You’re just starting with electronics
- Your project is indoors (room temperature range)
- You want to save money
- You need faster readings
- Precision isn’t critical
Choose the DHT22 if:
- You need outdoor weather monitoring
- Your project requires high accuracy
- You might encounter extreme temperatures
- You want to measure very low or high humidity
- You’re building something for long-term use
Real-World Applications
DHT11 Projects:
- Room temperature monitor
- Basic home automation
- Greenhouse monitoring (mild climates)
- Learning exercises
- Simple weather displays
DHT22 Projects:
- Outdoor weather stations
- HVAC system monitoring
- Industrial applications
- Scientific data logging
- Precision climate control
Tips for Beginners
- Start Simple: If you’re new to electronics, begin with the DHT11 to learn the basics
- Library Support: Both sensors work with the same Arduino libraries, making programming easy
- Response Time: Remember that these sensors need time to adjust – don’t expect instant readings when conditions change
- Protection: If using outdoors, protect your sensor from direct rain and extreme conditions
- Power Supply: Use a stable 5V power supply for best performance and longer cable runs
The Bottom Line
Both the DHT11 and DHT22 are excellent choices for measuring temperature and humidity. The DHT11 is perfect for beginners and indoor projects where you want to keep costs low. The DHT22 is worth the extra cost if you need better accuracy, wider ranges, or plan to use it outdoors.
The beauty of these sensors is that they’re both beginner-friendly, well-documented, and supported by a huge community of makers. Whichever you choose, you’ll be able to start measuring environmental conditions in your projects right away!
Happy making!